
How to Install Roof Shingles (Step-By-Step Guide for Homeowners)
Installing new roof shingles is one of the most effective ways to protect your home from leaks, improve energy efficiency, and boost curb appeal. While hiring a professional roofer is always the safest option, many homeowners choose to install shingles themselves—with the right guidance, tools, and safety precautions.
This step-by-step guide breaks the process down into clear, beginner-friendly instructions so you understand exactly how to prepare your roof, lay underlayment, install shingles, and finish the job correctly. Whether you’re replacing a few damaged shingles or re-roofing your entire home, this guide will help you approach the project with confidence, accuracy, and safety.
Let’s walk through the exact steps to install roof shingles the right way—without confusion, complicated explanations, or wasted materials.
Before You Start: Tools, Materials & Safety Checklist
Before installing roof shingles, you must prepare properly. The right tools, materials, and safety steps ensure a smooth, efficient, and hazard-free installation.
Use this checklist to set up your workspace like a professional roofer.
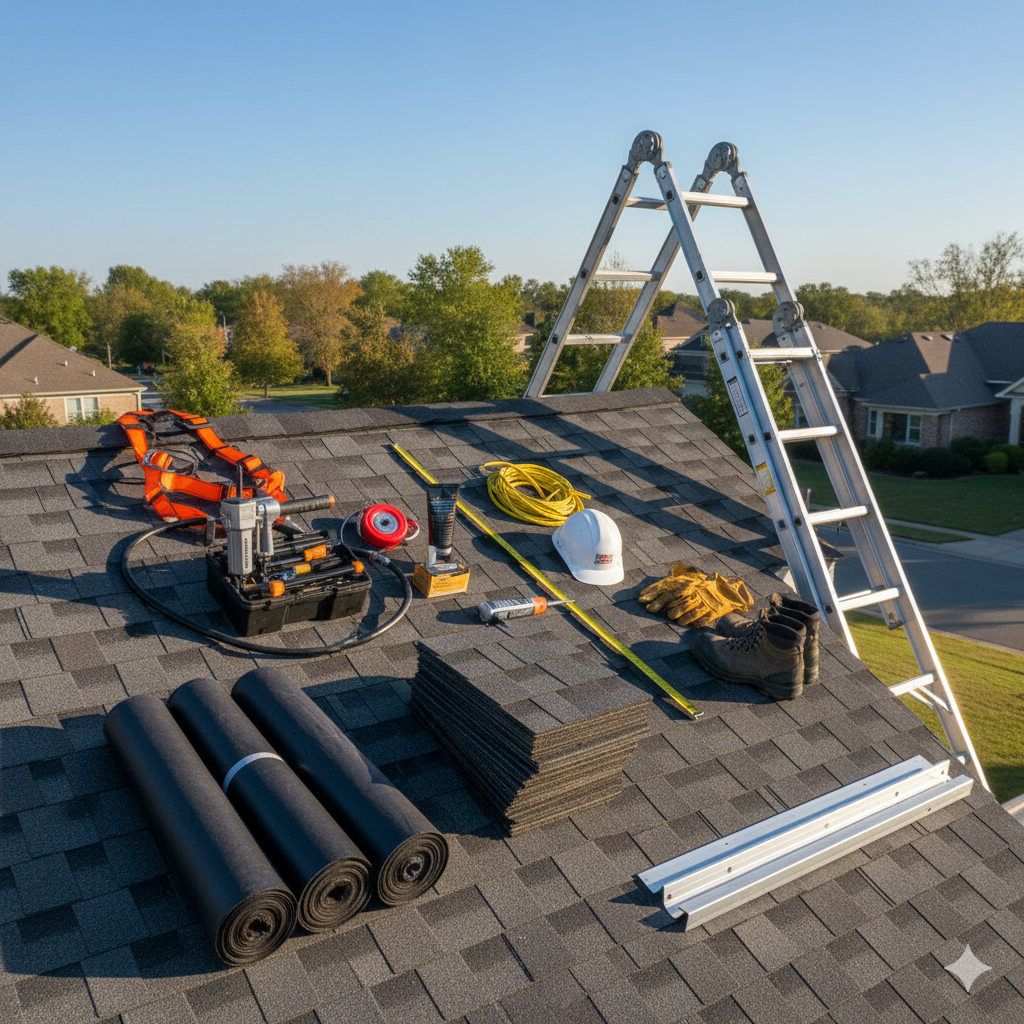
Tools You’ll Need
Make sure you have these essential tools ready before climbing the roof:
- Roofing hammer or nail gun
- Utility knife with extra blades
- Tape measure
- Chalk line for straight shingle rows
- Pry bar or shingle remover.
- Roofing shovel (for tear-off jobs)
- Tin snips (for trimming metal drip edge)
- Caulking gun
- Ladder stabilisers and roof brackets (optional but helpful)
Pro Tip:
Keep tools stored in a tool belt to avoid climbing up and down repeatedly.
Materials You’ll Need
Have all materials delivered and staged in a convenient, safe place near your home.
- Asphalt shingles (based on roof size + waste factor)
- Roofing underlayment (felt or synthetic)
- Ice and water shield for eaves and valleys
- Starter strip shingles
- Drip edge (eave and rake trim)
- Roofing nails (galvanised, 1¼” or per manufacturer spec)
- Ridge cap shingles
- Roofing cement or sealant
Pro Tip:
Measure ridges and hips in advance. Divide the total length by the coverage per bundle to know how many ridge caps to order.
Safety Gear & Ladder Precautions
Roofing involves height, sharp tools, and heavy materials. Prioritise safety at every step.
- Non-slip roofing boots
- Safety harness with roof anchors (recommended for slopes over 6:12)
- Hard hat
- Cut-resistant gloves
- Safety glasses
- Ladder with stabiliser or standoff
- Clear all debris from your workspace before starting.
Ladder Safety Tips:
- Set your ladder on level ground.
- Follow the 4:1 rule — for every 4 feet of height, move the ladder base 1 foot away from the wall.
- Make sure the ladder extends at least 3 feet above the roof edge.
Weather Conditions to Avoid
Weather can make or break a roofing project.
Avoid installing shingles when:
- Temperatures are below 40°F (5°C) — shingles become brittle
- Temperatures are above 85°F (29°C) — shingles become soft and scuff easily.
- It is raining or snowing.
- Winds exceed 15–20 mph.
- The roof surface is wet, icy, or slick.
Best Weather:
Cool, dry, and mild temperatures (45–75°F) with low wind.
Measure and Inspect the Roof
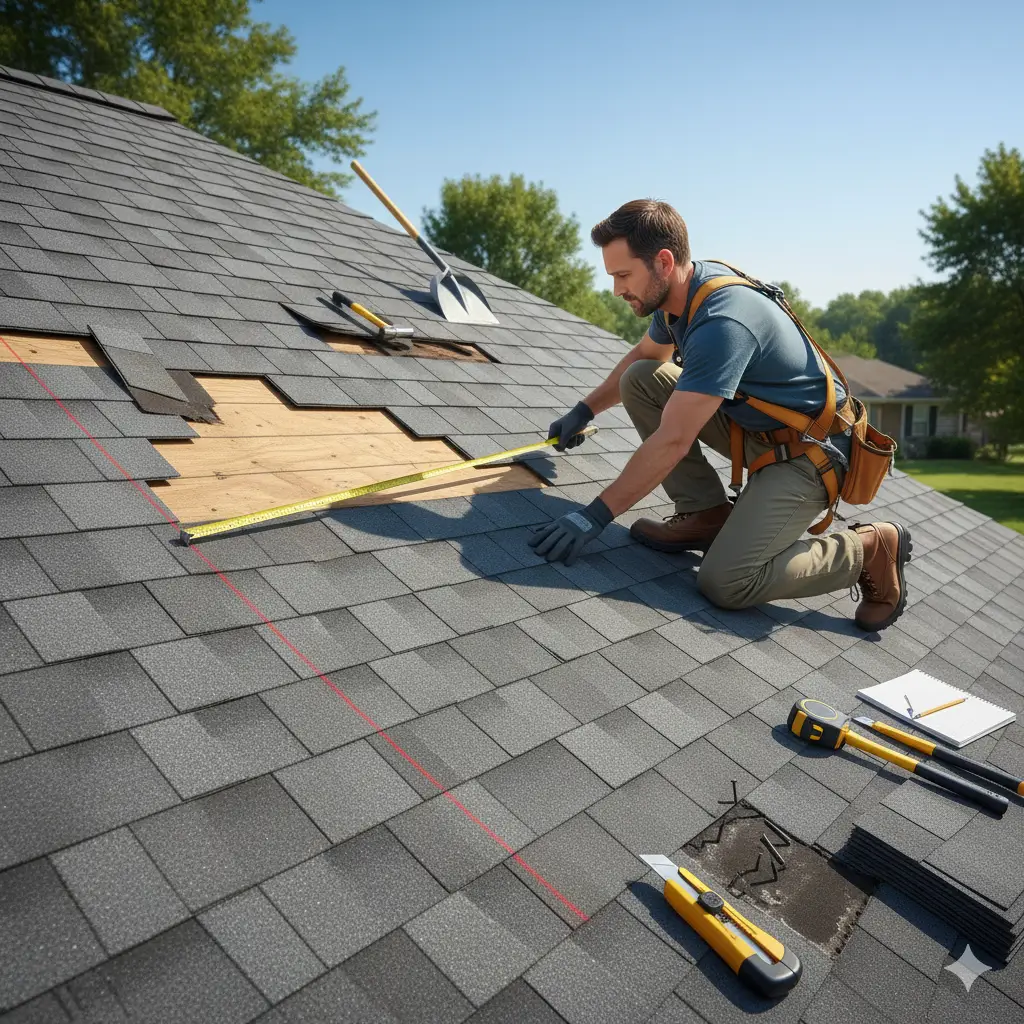
Before you begin installing shingles, you must know exactly how much material your roof requires—and whether the existing roof deck is safe to work on. Accurate measurements and a thorough inspection help you avoid shortages, unexpected repairs, or structural issues during installation.
Measuring Roof Area for Material Quantities
A correct roof measurement ensures you purchase the right amount of shingles, underlayment, and ridge caps. Follow these simple steps:
1. Measure Each Roof Section
- Measure the length and width of every rectangular or triangular roof section.
- Record your measurements in feet.
2. Calculate the Area
Use the formula:
Length × Width = Square Feet
Example:
20 ft × 25 ft = 500 sq. ft.
3. Add All Sections Together
Combine the square footage of all roof areas to get the total roof area.
4. Convert Square Feet to Roofing Squares
Roofers measure shingles in squares.
1 roofing square = 100 sq. ft.
Total sq. ft. ÷ 100 = Roofing Squares
5. Convert Roofing Squares into Shingle Bundles
Most asphalt shingles come in 3 bundles per square, so multiply:
Total squares × 3 = Number of bundles needed
6. Add Extra for Waste
Always order 10–20% extra for:
- Cutting waste
- Angles and valleys
- Starter course
- Ridge caps
Pro Tip:
Steeper or more complex roofs may require up to 15–20% extra material.
Checking for Damage, Rot, or Weak Decking
Before you install anything, inspect the roof deck for structural issues:
- Look for soft spots, which indicate moisture damage.
- Check for rotted plywood, mould, or peeling underlayment.
- Examine rafters for sagging or water stains.
- Ensure all decking nails are properly seated and not sticking up.
If you find rotted or weak decking, it must be replaced before shingles are installed. Shingles cannot seal properly on damaged surfaces.
Pro Tip:
If your roof is older, walk the surface and mark any spongy areas for repair.
Removing Old Shingles (if required)
If your local building code or manufacturer guidelines require a tear-off, follow these steps:
- Use a roofing shovel or pry bar to lift shingles and remove old nails.
- Start at the top ridge and work your way down.
- Remove old underlayment and clean the decking.
- Dispose of debris in a dumpster or designated staging area.
- Inspect the bare deck again for rot or damage.
When you can layer shingles:
Some regions allow installing a second shingle layer over the first, but this is only acceptable if:
- The old shingles are flat
- Decking is in excellent shape.
- The roof structure can support the weight.
Most professionals still recommend a complete tear-off for a longer roof life.
Prepare the Roof Deck
A properly prepared roof deck ensures your shingles lie flat, seal correctly, and last for decades. Before installing any new materials, make sure the surface is clean, dry, and reinforced for long-term weather protection.
Clean Surface + Repair Sheathing
Start by ensuring the roof deck (plywood or OSB) is in perfect condition:
- Sweep away dust, nails, and leftover debris
- Look for cracks, holes, or water damage.
- Replace any soft, rotted, or uneven sheathing.
- Re-nail loose decking so the surface is tight and flat.
A smooth deck is essential—any bumps or gaps underneath will show through the shingles and may lead to leaks later.
Pro Tip:
Run your foot lightly across the decking. Soft spots indicate moisture damage and must be replaced before continuing.
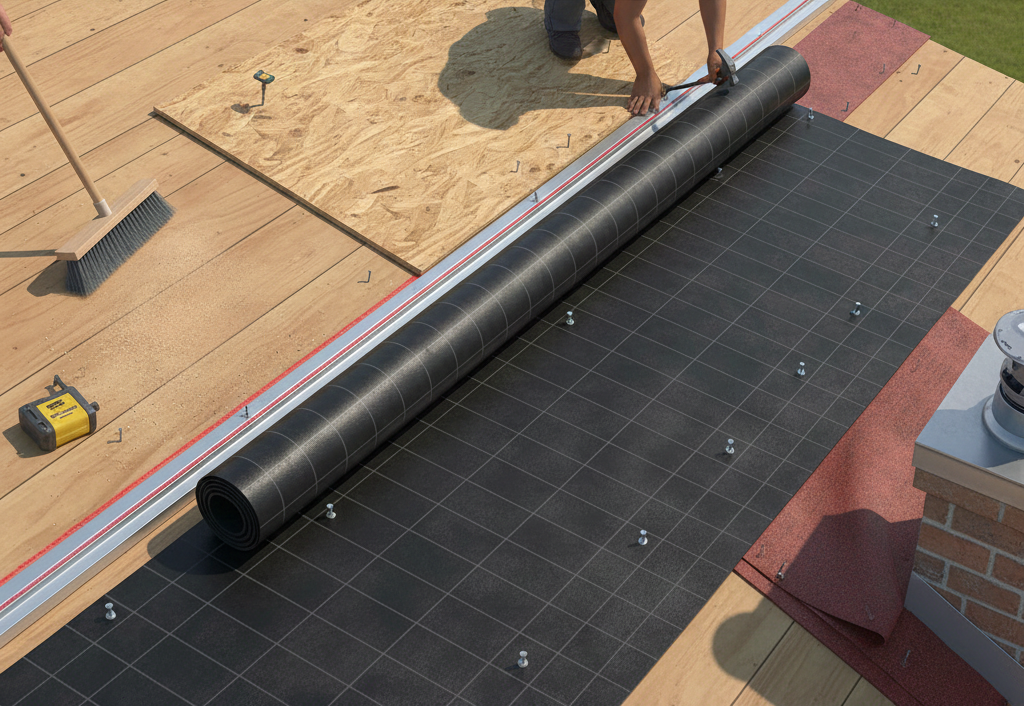
Install Drip Edge Along Eaves
The drip edge protects your fascia from water damage and helps direct rain into the gutters.
How to Install Drip Edge Properly:
- Line the drip edge up flush with the eaves (bottom edge of the roof).
- Snap a chalk line to ensure straight alignment.
- Pull the drip edge down about ½ inch from the chalk line.
- Nail it every 8–10 inches using 1¼” galvanised roofing nails.
- Install drip edge on gabled ends after the underlayment goes on.
The drip edge creates a clean finish and prevents water from seeping behind the gutters or into the decking.
Apply Roofing Felt / Underlayment
Roofing underlayment is your secondary water barrier and protects the decking from moisture during installation.
Steps to Install Underlayment:
- Start at the bottom edge of the roof and work upward.
- Roll out the underlayment horizontally across the deck.
- Overlap each row 3–4 inches to prevent water intrusion.
- Use cap nails or staples spaced per manufacturer guidelines.
- Smooth out wrinkles to prevent shingle misalignment.
Synthetic underlayment is ideal because it’s stronger, more durable, and resists tearing in windy conditions.
Add Ice & Water Shield in Vulnerable Areas
Ice and water shield provides extra protection in areas prone to leaks. It is essential in colder climates.
Apply it in these key locations:
- Eaves (edges of the roof)
- Valleys
- Around chimneys
- Around skylights
- Roof penetrations (vents, pipes, etc.)
To install:
- Peel the backing and position the membrane.
- Apply it directly to the clean decking.
- Press firmly for a watertight seal.
This step prevents ice dams, wind-driven rain, and water runoff from entering your home during storms.
Install Starter Shingles
Starter shingles create the foundation for every row of shingles above them. They help seal the roof edge, improve wind resistance, and prevent water from seeping under the first shingle course. Installing them correctly ensures a straight, durable, and leak-free roof.
Why Starter Strips Are Important
Starter shingles are not the same as your regular shingles—they serve a specific purpose at the roof edge.
Starter strips provide:
- A watertight seal at the eaves
- Wind protection, reducing the chance of shingle blow-off
- A straight line for the first row of field shingles
- Correct overlap and downward water flow
Even if you cut your own starter strips (by trimming off the tabs of a three-tab shingle), they must include a factory-applied adhesive strip facing upward to secure the first course.
Without starter shingles, your roof becomes vulnerable to leaks and wind damage—especially at the edges.
Correct Alignment at the Roof Edge
Proper alignment ensures your roof looks straight and drains water correctly.
How to align the starter shingles:
- Begin at the bottom-left edge of the roof.
- Lay your starter strip so it overhangs the drip edge by ¼–½ inch.
- Make sure the adhesive strip is facing upward and toward the roof edge.
- Use a chalk line for perfectly straight placement.
Continue across the roof, ensuring tight end-to-end joints without gaps.
Pro Tip:
Stagger the joints of your starter shingles so they don’t line up with the joints of the first shingle course—this improves water shedding.
Nailing Pattern & Overhang Tips
Correct nailing is essential for wind protection and long-term durability.
Follow these nailing guidelines:
- Use four nails per strip, placed in the manufacturer’s recommended nail line.
- Nails should be driven flush—not angled or overdriven.
- Ends of each strip should be secured carefully to prevent lifting in high winds.
Important Overhang Tips:
- Overhang the starter shingles ¼–½ inch over the drip edge.
- Too little overhang → water may run behind gutters.
- Too much overhang → strip may sag or break in the wind
- Too little overhang → water may run behind gutters.
- Keep joints slightly offset to prevent stacking seams.
Once the starter strips are installed, you’re ready to begin the first row of field shingles.
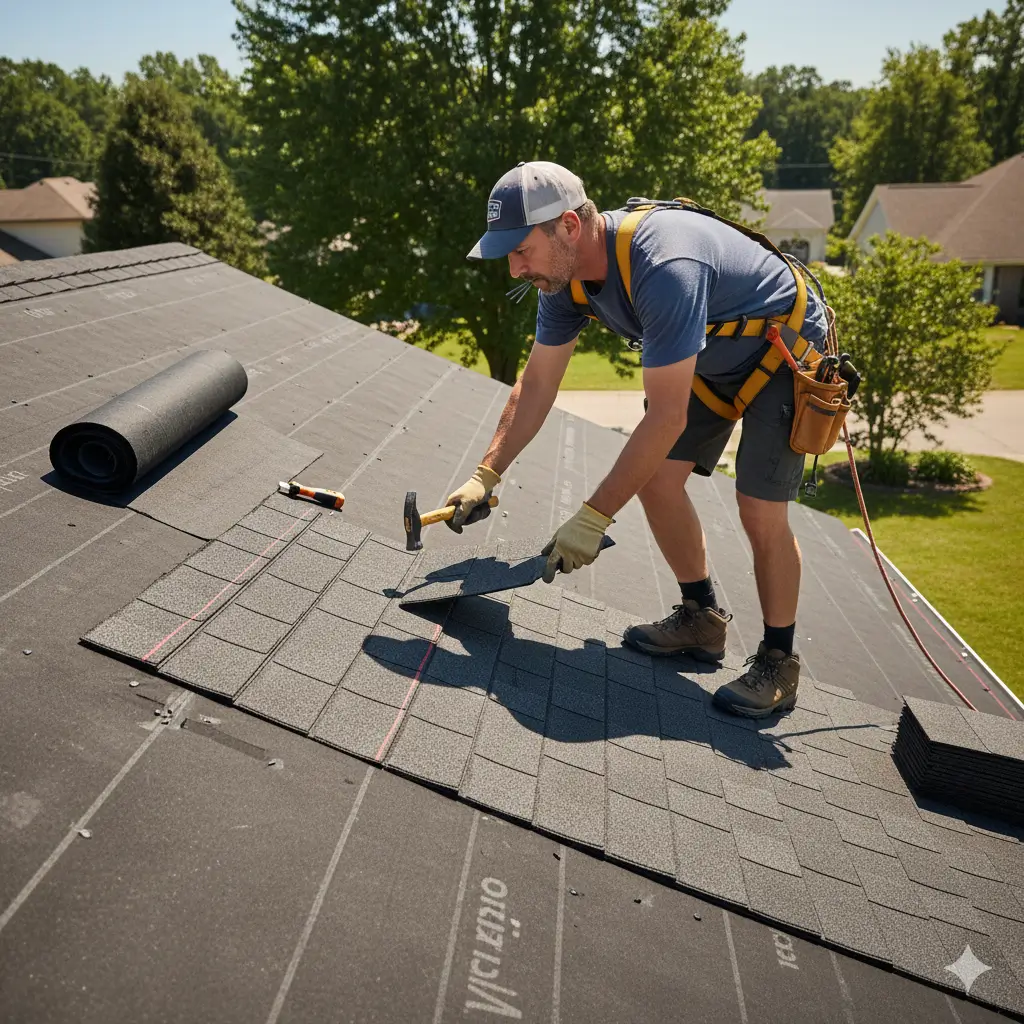
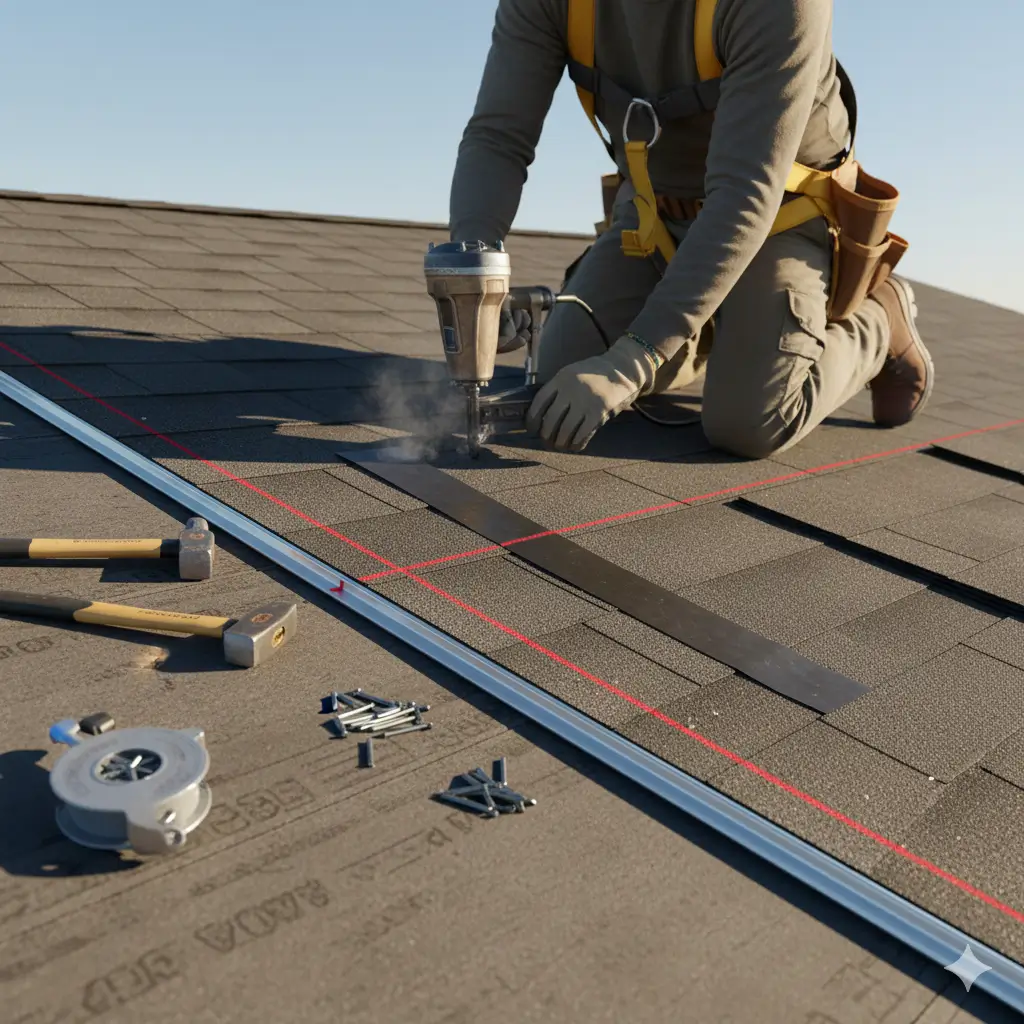
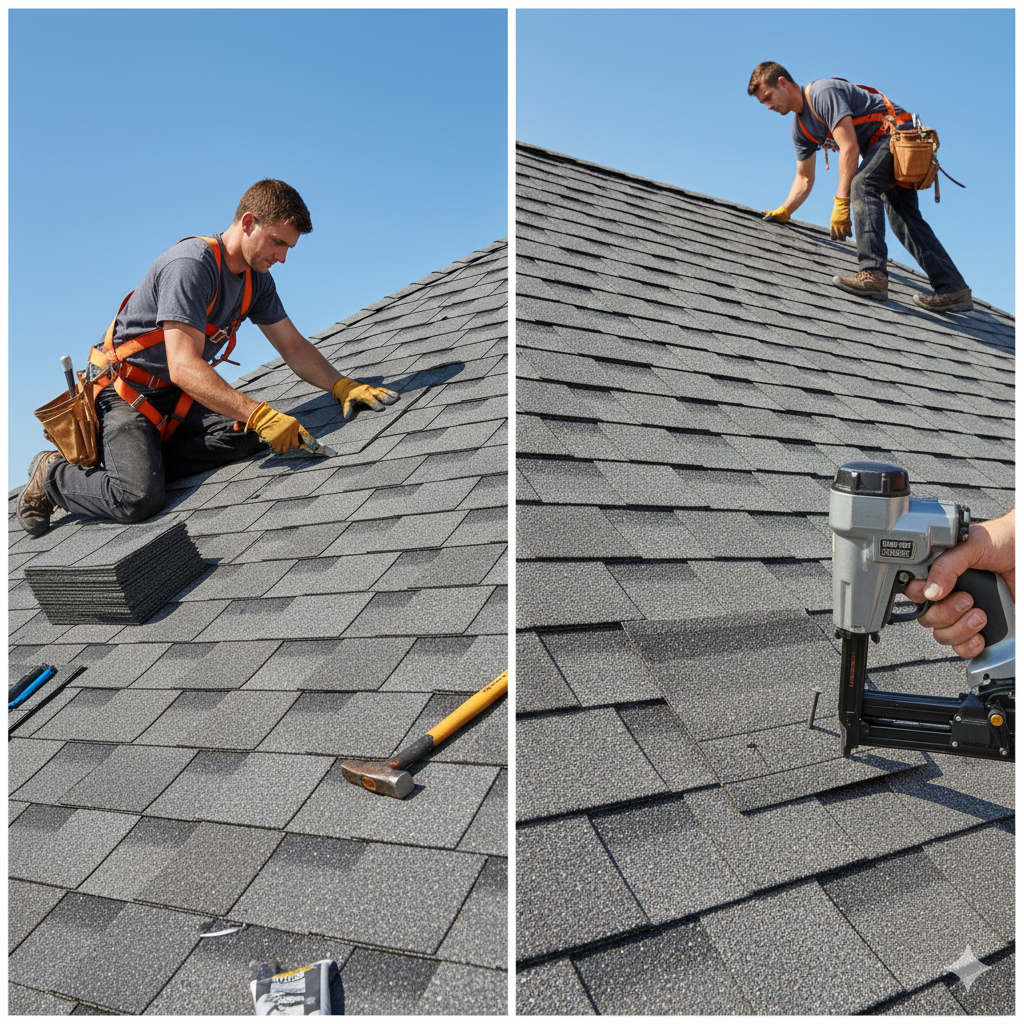
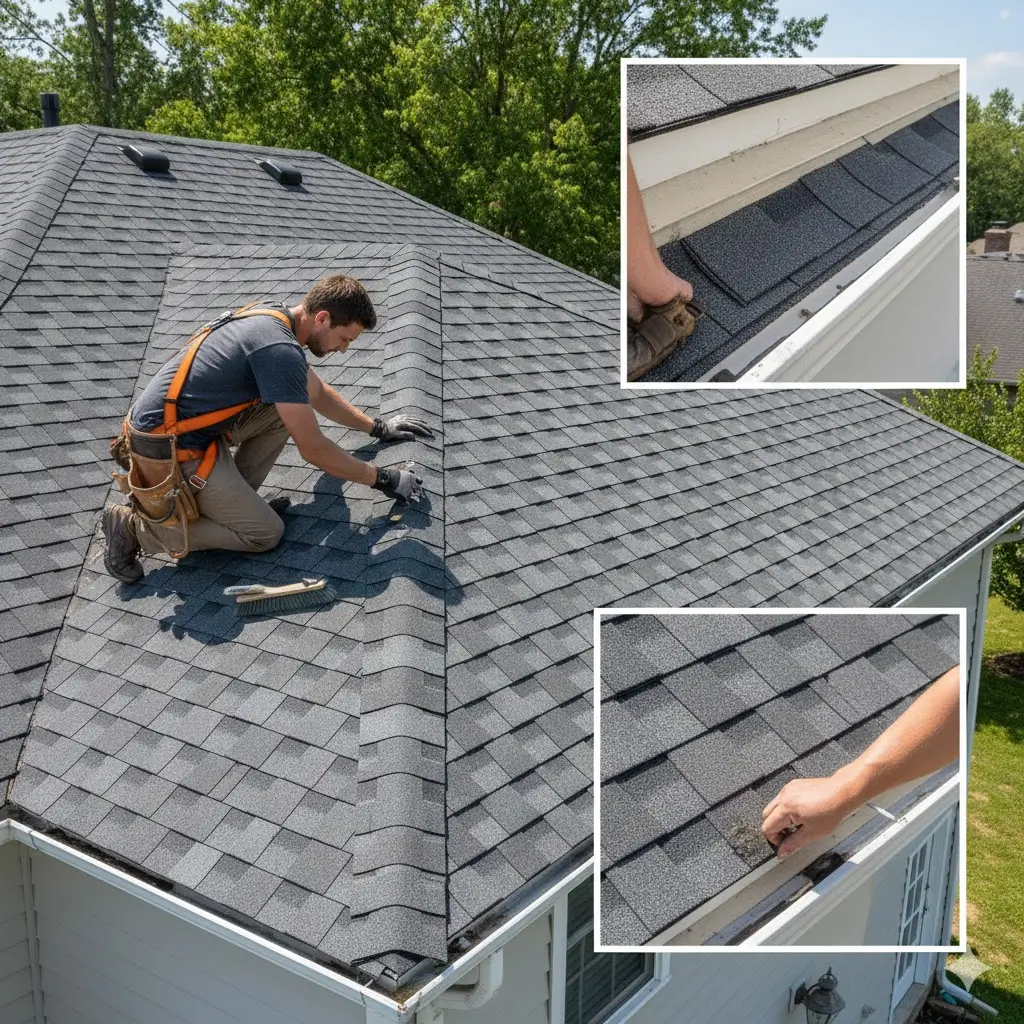
Install Roof Shingles (Main Courses)
With your starter shingles in place, you’re ready to install the main roofing courses. This step determines the overall look, durability, and lifespan of your roof—so accuracy and consistency matter.
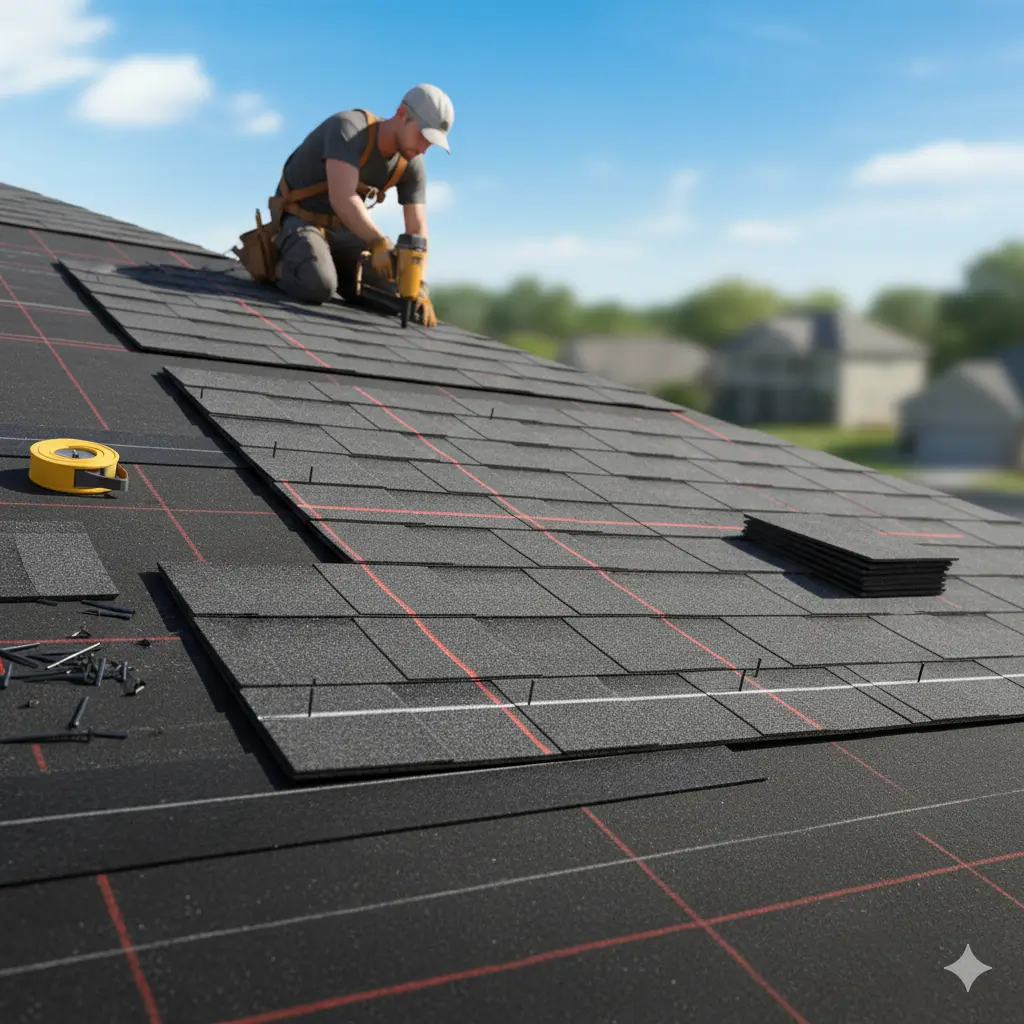
Snap Chalk Lines for Accuracy
Straight lines are essential for a clean, professional-looking roof.
Use chalk lines to guide your rows:
- Start at the bottom of the roof and measure upward according to the shingle exposure (typically 5″–6″, depending on the manufacturer).
- Snap horizontal lines across the roof at each exposure interval.
- Snap vertical chalk lines every 6 feet to keep the rows perfectly aligned.
Why it matters:
Chalk lines prevent drifting, uneven rows, and crooked shingles—which are hard to fix once you reach the upper sections of the roof.
Install the First Shingle Course
The first course sits directly above your starter strip and sets the pattern for the entire roof.
Steps:
- Place a full shingle at the bottom-left corner.
- Align its bottom edge with the top of the starter strip.
- Make sure the overhang matches the starter (¼–½ inch).
- Nail it according to manufacturer guidelines.
- Continue installing shingles across the entire row, butting them tightly end-to-end.
Pro Tip:
Double-check alignment after every 4–5 shingles. Small shifts add up as you go higher.
Working From the Bottom Up
Roof shingles must always be installed from the bottom of the roof upward.
This ensures:
- Proper water shedding
- Correct overlap
- Secure fastening
- Better wind resistance
Each new row should overlap the previous row’s nail line, covering all fasteners completely.
Proper Nailing Technique
Correct nailing is critical for long-term performance.
Follow these guidelines:
✔ Use four nails per shingle
✔ Use six nails in high-wind areas
✔ Place nails:
- 1 inch above the shingle’s cutouts (or in the nail line)
- 2 inches from each end
✔ Drive nails straight, not angled
✔ Nails must be flush with the shingle, never sunk too deep or left raised
Why this matters:
Improper nailing is the #1 cause of shingle blow-off and manufacturer warranty denial.
Continue Installing Rows / Offset Pattern
Staggering your shingle joints prevents leaks and distributes wind pressure evenly.
The standard offset pattern:
- Cut 6 inches from the first shingle in the second row
- Cut 12 inches from the first shingle in the third row.
- Cut 18 inches from the first shingle in the fourth row.
- Repeat the cycle (or use your manufacturer’s recommended offset)
As you work upward:
- Align each shingle with your chalk lines
- Maintain consistent exposure
- Trim the last shingle on each row as needed.
- Ensure all joints are offset to avoid stacked seams.
- Check rows frequently to keep them straight.
Continue this process until you reach the ridge.
Install Shingles in Roof Valleys
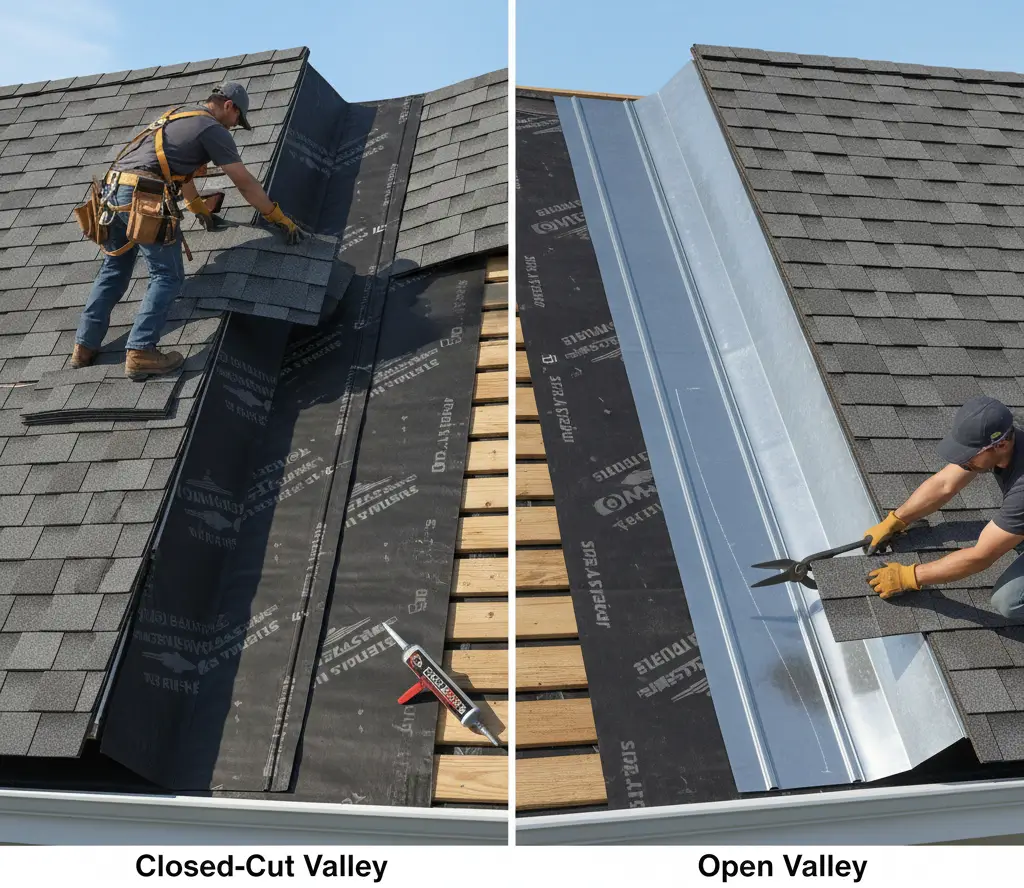
Roof valleys are where two roof planes meet, and they are often the most vulnerable spots for leaks. Proper installation in these areas is critical for water shedding and long-term roof performance. Follow these methods to ensure durability and protection.
Closed-Cut Valley Method
The closed-cut method is commonly used in residential roofing and provides a clean, finished look.
Steps:
- Install shingles on one side of the valley first.
- Lay shingles on the opposite side, cutting and tucking the edges under the first side’s shingles.
- Ensure the overlapping shingles direct water down the valley and off the roof.
- Maintain a straight line and consistent exposure along the valley to prevent gaps.
Benefits:
- Neat appearance
- Simple installation for asphalt shingles
- Effective water runoff, when done precisely
Open Valley Method
The open valley method uses metal flashing to reinforce water protection, often preferred in regions with heavy rain or snow.
Steps:
- Install a metal valley flashing along the centerline of the valley.
- Extend the flashing slightly beyond the roof edges for extra protection.
- Lay shingles on either side of the valley, cutting the edges neatly along the flashing.
- Overlap shingles slightly over the flashing to ensure proper drainage.
- Seal edges with roofing cement where needed to prevent leaks.
Benefits:
- Maximum water protection
- Reduces risk of leaks in high-precipitation areas
- Clear visual guide for proper shingle placement
Sealing and Water Protection in Valleys
Regardless of the method, proper sealing is essential:
- Apply ice and water shield or underlayment along the valley for extra protection.
- Ensure flashing edges are tightly secured to prevent wind-driven water infiltration.
- Trim shingles carefully—avoid exposing nail heads or gaps in the valley.
- Check alignment and slope frequently to ensure water flows naturally toward gutters.
Pro Tip:
Valleys are high-stress areas—double-check that all fasteners are flush, all shingles overlap correctly, and no debris is trapped in the valley before finishing.
Install Hip and Ridge Shingles
The hip and ridge are the topmost lines of your roof where two planes meet. Installing shingles properly in these areas not only finishes the roof aesthetically but also ensures water tightness and wind resistance. Follow these steps for a professional-quality finish.
Cutting and Shaping Ridge Caps
Ridge caps are specially designed shingles or cut pieces of standard shingles that cover the peak of the roof.
Steps:
- If using standard shingles, cut each shingle into equal strips (usually 12–18 inches long) to fit the ridge.
- Ensure a consistent overlap of 2–3 inches between ridge shingles.
- Shape shingles to fit hips (diagonal ridges) if necessary, trimming edges so they lie flat without gaps.
- For pre-cut ridge caps, simply follow manufacturer guidelines for spacing and overlap.
Pro Tip:
Always dry-fit a few ridge shingles before nailing to confirm alignment and overhang.
Installation Order: Hip → Ridge
Proper sequencing is critical:
- Start with the hip lines first if your roof has hip ridges.
- Install ridge shingles along the main horizontal ridges after the hips are complete.
- Work from one end to the other, maintaining consistent overlap and exposure.
- Ensure all ridge caps are aligned so water flows smoothly down both roof planes.
Why this matters:
Following the hip → ridge order prevents misaligned shingles, gaps, or uneven overhang, which can cause leaks.
Nail Placement to Avoid Leaks
Correct nailing ensures ridge shingles remain secure and watertight.
Guidelines:
- Use 2 nails per ridge shingle, or as recommended by the manufacturer.
- Place nails about 1 inch from each end of the shingle, slightly above the overlap line.
- Avoid nailing through the exposed portion of the shingle to prevent water infiltration.
- Drive nails flush, not over- or under-driven.
- In windy regions, consider extra fastening following the manufacturer’s instructions.
Pro Tip:
Seal nail heads with a small dab of roofing cement if the ridge is exposed to high wind or heavy rain.
Final Steps & Quality Checks
After installing all shingles, the finishing touches are crucial to ensure a durable, water-tight roof. This final inspection guarantees that your roof not only looks professional but will perform reliably for years to come.
Seal Exposed Nails
- Inspect all ridge, hip, and field shingles for any exposed nail heads.
- Apply a small dab of roofing cement to each exposed nail to prevent water infiltration.
- Ensure that nails on valleys, hips, and ridges are properly embedded and flush with the shingles.
Pro Tip: This step is essential in areas prone to heavy rain or strong winds.
Check for Straight Lines and Proper Overhang
- Walk around the roof and check that shingle rows are straight and evenly spaced.
- Confirm that eave and rake overhangs match manufacturer recommendations (usually 1/4–3/4 inch over the drip edge).
- Ensure starter strips and ridge caps are aligned for a clean, uniform look.
Why it matters: Straight lines and consistent overhang improve both aesthetics and water drainage.
Clean Roof & Gutters
- Remove leftover shingles, nails, and debris from the roof surface.
- Check gutters and downspouts for nails or shingle scraps that may clog them.
- Sweep the roof and surrounding area to ensure safety and functionality.
Pro Tip: A clean roof reduces the risk of water backup and ensures proper drainage.
Inspect for Proper Adhesion
- Press down on shingles gently to confirm they are securely adhered or nailed.
- Check that ice and water shields, underlayment, and flashing are intact.
- Look for gaps, lifted edges, or improperly overlapped shingles, and correct any issues immediately.
Pro Tip: A final inspection can prevent leaks and extend the life of your roof.
FAQ: Common Questions About Installing Roof Shingles
- The time required depends on roof size, complexity, and shingle type.
- A standard 1,500–2,000 sq. ft. asphalt roof typically takes 1–3 days for a professional crew.
- DIY projects may take longer, depending on skill level and weather conditions.
- Tip: Always allocate extra time for inspections, repairs, or unexpected delays.
- Yes, but with caution. Installing over old shingles is called a “roof-over.”
- Benefits: Saves time and disposal costs.
- Drawbacks: Adds weight to the roof deck and may hide underlying damage.
- Best practice: Remove old shingles if there’s rot, water damage, or more than one existing layer.
- Tip: Always follow local building codes, which may limit the number of layers.
- Ideal conditions: Dry, mild weather with temperatures between 60°F–85°F (16°C–29°C).
- Avoid installing in rain, snow, or extreme heat, as it can affect shingle adhesion and safety.
- Early spring, late summer, or early fall are often the best times for DIY or professional installation.
- Tip: Check the weather forecast for several consecutive days to ensure proper installation.
- Typically, 4 nails per standard asphalt shingle are recommended for normal conditions.
- In areas with high winds, increase to 6 nails per shingle for extra security.
- Place nails above the adhesive strip, about 1–2 inches from each edge, and drive them flush without breaking the shingle.
- Tip: Follow the shingle manufacturer’s instructions—incorrect nailing can void the warranty.